When you buy a watermelon from the grocery store or farmer’s market, your first thought is probably that you can’t wait to cut into it and eat it as soon as possible. Watermelons are one of the most enjoyable fruits to eat and prepare, but have you ever wondered what the stages of watermelon growth look like?
In this article, we’re going to take a closer look at a watermelon’s stages of growth from when you plant a seed to when it’s a fully grown fruit.
Let’s dive right in.
Stages of Watermelon Growth
Stage 1: Planting the Seed

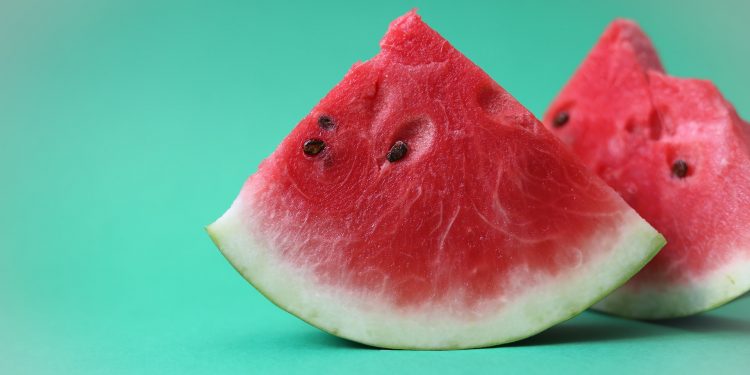
If you’ve ever eaten a watermelon, you know that these fruits are packed with hundreds of small, flat, black seeds. Therefore, if you want to grow a watermelon, we recommend washing a handful of seeds from the last watermelon you ate.
If you don’t have a watermelon to harvest seeds from, you can always buy some seeds. There are over 1000 varieties of watermelon worldwide, so we recommend doing some research to see which varieties are grown in the area that you live in.
For best results, we recommend chitting the seed before you plant it in soil. This means that you let the seeds germinate for a couple of days before transferring them to some soil. To do this, here’s what you need to do:
- Wash your watermelon seeds in plain water.
- Dampen a paper towel, but do not let the water soak the towel all the way through.
- Place the seeds on the damp paper towel.
- Transfer the paper towel and seeds to a plastic container, and cover the container with cling film or plastic wrap.
- Let it sit for at least three days.
Once you notice that roots have formed, the next step is to transfer the seeds to a soil mix. We recommend using a loamy soil mix that drains well. Plant the seeds in an area of your garden that receives a lot of sunlight.
When planting the seeds, it’s a good idea to plant each individual seed at least three feet away from the next one. This way, once the watermelon starts to grow, it won’t crowd the other melons.
You must water the seeds thoroughly every day, and ensure that your seeds get a minimum of eight hours of sunlight per day.
Also Read: Top 10 Delicious Florida Fruits You Must Try
Stage 2: Germinating and Sprouting
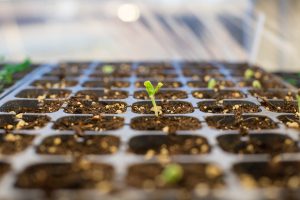
The next step in a watermelon’s growth stage is germination. While you might have kickstarted this stage by chitting the seeds, a watermelon seed won’t germinate properly for a while; it will take at least 3 days to two weeks to germinate.
During this phase of growth, the seed will begin to sprout a small stem, which is called the hypocotyl. This tiny stem plays an important role in the life cycle of any plant, because it allows that plant to grow and form roots in the soil.
After the watermelon seed has germinated, it starts to produce leaves. These are embryonic leaves that are found in seed-bearing plants, and they are called cotyledons. They are the first leaves that a seed produces after it has been planted, and they will slowly push through the surface of the soil.
During this stage of germination and sprouting, it’s important to note that your watermelon plant is especially susceptible to danger. Therefore, if you have pets or live in a place with a colder climate, you must take extra care of your plants.
You must also ensure that your watermelon patch is moist at all times. Having said that, while moisture is important, you must not over-water it.
Stage 3: Vegetative Growing

This next stage is when things start to become more exciting! Now that your seeds have sprouted, you’ll notice that your plant is starting to grown quicker.
It will take around five to ten days to see leaves sprouting. It’s worth noting that the new leaves you’ll see at this stage are different from the leaves during the sprouting stage. Those are embryonic leaves, and these are true leaves. They represent the stages of vegetative growth, and resemble what mature watermelon leaves look like.
During the vegetative stage, the true leaves begin to photosynthesis, and convert sunlight into energy that helps them to grow. Over the following two weeks, you’ll notice that the leaves will become more sturdy as they begin to grow even more. During this time, you will also notice that the watermelon plant grows its main vine.
Stage 4: Branching
The next stage of watermelon development is branching. As the main watermelon vine grows, you will start to see smaller and newer vines emerge from the main one. It’s worth noting that the length of these vines will vary depending on the watermelon’s variety, though the average watermelon vine grows to around 10 to 12 feet long.
Since the vines are branching out and growing rapidly during this stage, it’s important to keep you watermelon plant’s nutritional needs in mind. To help keep it healthy, you could add some bone meal to the soil, taking care to mix it in gently with the roots.
It’s also worth noting that a single branch can produce several melons, not just one. If the watermelon plant is healthy, it can grow anywhere from 3 to 6 melons. However, if it is struggling to grow, you can care for the plant by taking off any weak branches or removing the excess branches.
Also Read: Red Vs White Dragon Fruit.
Stage 5: Flower Production and Pollination
The next stage is the flower production and pollination stage. During this stage, the plant will product yellow flowers, both male and female ones. The male flowers usually grow first when the phase of branching begins, and the female flowers start growing when the vine branches mature.
The male flowers have a pollen-covered anther, while the female flowers have the stigma. The two flowers will pollinate, but the male flower generally dies after some time. Unlike some other flowers, watermelon flower do not have the ability to self-pollinate.
Stage 6: Setting Fruit
The final stage of watermelon growth is the setting fruit stage. It begins after pollination. If you observe your watermelon plant carefully during this time, you’ll notice that a bulge forming behind the female flower! This bulge will eventually turn into a whole melon over the course of a month.
Fun fact: the watermelon is actually a form of berry!
Stage 7: Harvesting

After the fruit grows for over a month, it is time to harvest it. Depending on where you live and the time of year it is, the timeline for harvesting will differ. Still, you’ll know that the watermelon is ripe and ready to be harvested when you tap on it. If it produces a hollow sound, then it is ripe. If you’re still unsure about its ripeness, you can also check for a yellow spot or brown tendrils on the vine.
Check out our article on ‘Are Black Spots on Broccoli Safe to Eat?'
Conclusion
In this article, we walked you through the different stages of watermelon development. This fruit is eaten all over the world and is prepared in a wide variety of ways. If you had always wanted to grow a watermelon but felt intimidated by the process, we hope this article put your mind at ease!


